Background knowledge
In laptop manufacturing, precision in details directly determines product quality and user experience. The key factor affecting both the product's tactile feel and operational stability is the key edge clearance. This clearance measures the height difference between keyboard components and the laptop's casing. Exceeding the permissible range not only causes key lag and dust accumulation but also compromises the device's aesthetic integrity, ultimately diminishing consumer confidence.
Traditional inspection methods, such as manual visual inspection or 2D imaging, struggle to accurately detect height variations in three-dimensional space, are prone to interference from light and angles, and are inefficient. With the advancement of industrial automation technology, 3D camera inspection technology has emerged as the core solution for edge gap detection in laptop keyboards, thanks to its high precision, efficiency, and stability.

Camera Selection
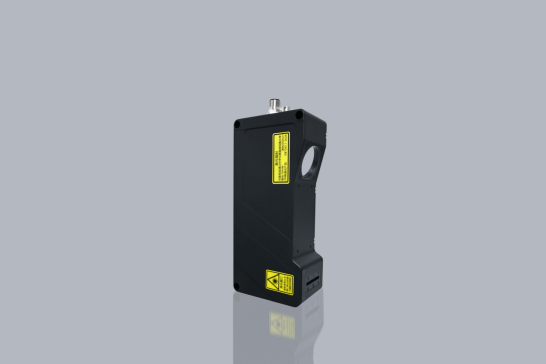
Today, we're excited to showcase the LVM3050 linear laser 3D camera, a new addition to Next Vision Tech's LVM3000 series, and its real-world applications in the 3C industry!
The LVM3050 3D smart sensor features a full-frame 600Hz acquisition rate, with ROI settings supporting up to 10,000Hz. It effortlessly handles high-speed dynamic scenes, delivering repeatable precision of 0.5μm and capturing every detail, making it ideal for high-precision industrial inspection.
surveillance project
·Breakdown test
·Product dimensions: 240mm x 360mm
·Repeatability requirement: 0.05mm
Material: Gray plastic
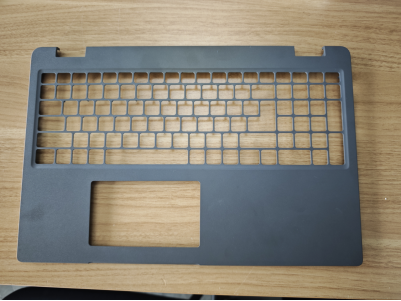
*Image shows the actual product
Detection environment and installation method
·Scanning method: The camera remains stationary while the test sample moves along a central straight line for scanning
·Triggering method: Encoders trigger to output stable AB phase difference signals
·Communication mode: TCP/IP Ethernet
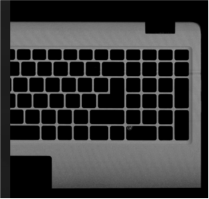
Image capture effect
First paragraph image effect
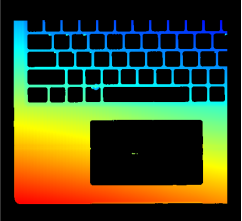

*The image shows a point cloud and a brightness map
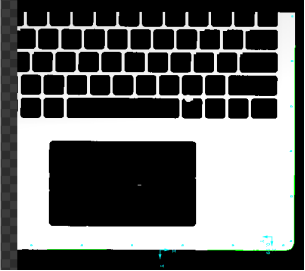
Second image effect
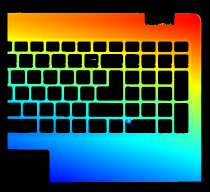
*The image shows a point cloud and a brightness map
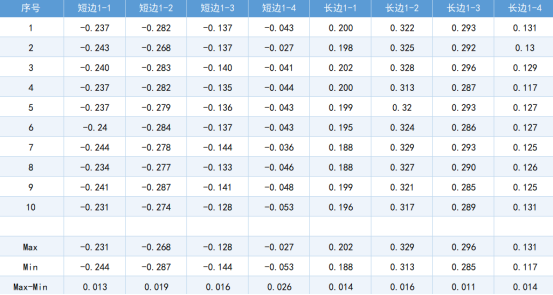
measured data
·Using the depth image of the point cloud captured by the camera, select points at the
product's edge. The two outermost points are fitted to form the reference plane, and the offset distances from the four intermediate points to this plane are calculated.
·The experiment was repeated 10 times in total
DA
The first set of measurement data
Second set of measurement data
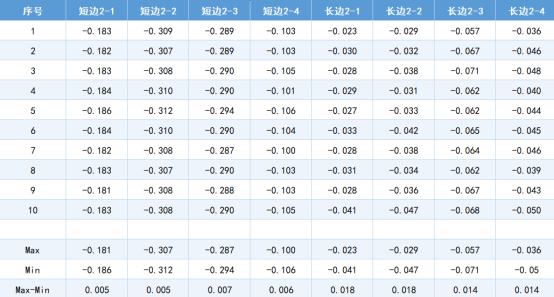
*Measure 10 sets of dynamic data, with a maximum dynamic repeatability of 0.026mm across all four edges
Test conclusion
·This imaging solution delivers comprehensive results with clear, unobstructed feature images. The LVM3050 camera accurately measures the distance from product edges to the upper surface.
·When four edges are measured, the maximum static repeatability across 10 repetitions is 0.026mm, meeting the 0.05mm testing requirement.
·The theoretical maximum speed of this test can reach 235mm/s
 2025/09/19
